Understanding the Difference: HDD vs. SSD
Hard Disk Drives (HDDs) use mechanical components to read and write data, which can result in slower performance due to physical movement. In contrast, Solid State Drives (SSDs) have no moving parts, relying on flash memory to provide:
- Faster Boot and Load Times: Your operating system and applications start almost instantly.
- Increased Durability: SSDs are more resistant to shocks and drops.
- Lower Power Consumption: Better energy efficiency for laptops and desktops.
Benefits of Upgrading to an SSD
Upgrading from an HDD to an SSD offers a myriad of benefits, including:
- Enhanced Speed and Performance: Experience rapid boot-ups, quick file transfers, and overall snappier system response.
- Improved Multitasking: Run multiple applications smoothly without lag.
- Quiet Operation: Eliminate the noise associated with spinning disks.
- Lower Failure Rates: SSDs tend to be more reliable over time.
- Energy Efficiency: Reduce power usage, which is especially beneficial for laptop users.
Tools and Preparation for Your SSD Upgrade
Before you begin the upgrade, ensure you have the right tools and have taken the necessary precautions:
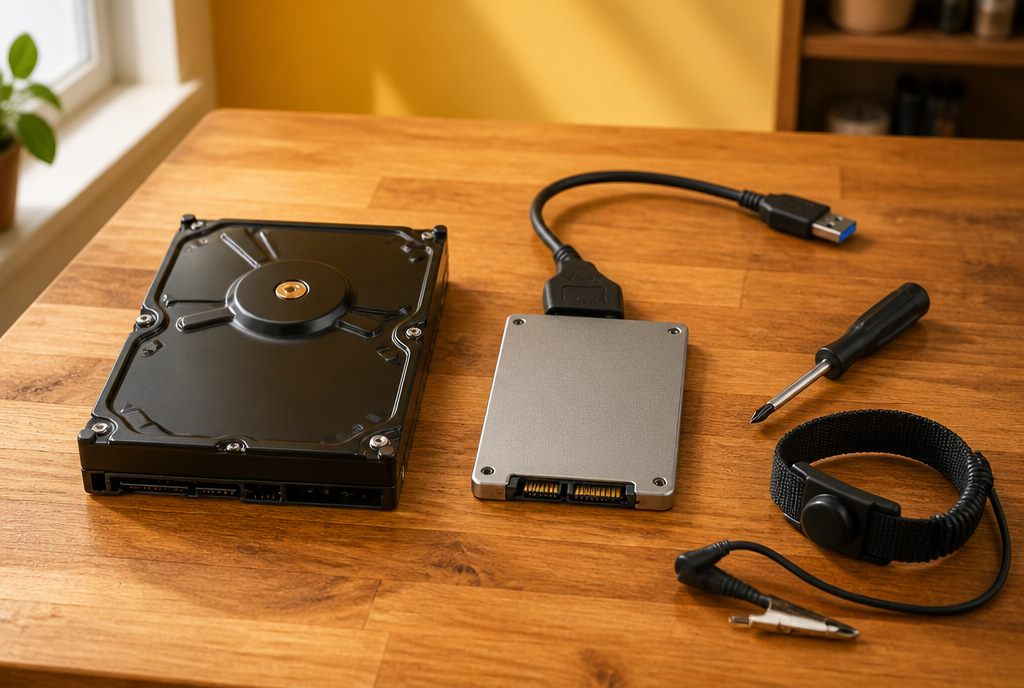
- Essential Tools: A Phillips-head screwdriver, an anti-static wristband, your new SSD (make sure it's compatible with your system), cloning software (if you plan to transfer your existing data), and a USB-to-SATA adapter (optional).
- Preparation Steps: Backup your data, review your PC's manual, and plan your upgrade strategy.
Step-by-Step HDD to SSD Upgrade Process
- Back Up Your Data: Always safeguard your important files using backup software or an external drive.
- Gather and Prepare Your Tools: Organize your screwdriver, anti-static wristband, SSD, and necessary cables in a clean, static-free workspace.
- Power Down and Unplug Your PC: Shut down your computer and disconnect all cables to minimize the risk of electrical damage.
- Open Your Computer Case: Remove the side panel of your desktop or access the storage compartment of your laptop. Consult your device's manual if needed.
- Remove the Old HDD: Locate your HDD, disconnect both the power and data cables, and carefully unscrew it from its mounting bracket.
- Install the New SSD: Place the SSD in the drive bay or use an adapter if necessary, then secure it with screws and reconnect the appropriate cables.
- Clone Your HDD or Perform a Fresh Install: Use reliable cloning software to transfer your operating system and data, or perform a fresh installation if you prefer a clean start.
- Reassemble and Power On: Once the SSD is securely installed, reattach your computer's panel, plug everything back in, and verify that the SSD is recognized.
- Optimize Your SSD: Enable TRIM (if not already active), update your firmware and drivers, and uninstall any unnecessary software to maximize performance.
Troubleshooting Common Issues
Even with careful planning, issues may arise during your upgrade. Here are some troubleshooting tips:
- SSD Not Detected: Double-check all cable connections and consult the manufacturer's website for firmware updates or compatibility information.
- Cloning Errors: Verify that your cloning software is compatible with your system; if problems persist, consider performing a fresh installation.
- Boot Problems: Ensure your BIOS settings are configured to boot from the SSD by adjusting the boot order if necessary.
Why Choose Easy-PC in Natick?
At Easy-PC, we empower our Natick & MetroWest customers with expert advice and professional repair services. From our shop at 96 West Central St, Unit 2, Natick, MA 01760 (the yellow house), we install SSDs, clone Windows installations, and troubleshoot upgrades for customers across Framingham, Wellesley, Wayland, Ashland, Sherborn, Holliston, Sudbury, Dover, Needham, and Weston. Same-day in many cases, and always backed by our No Fix - No Fee guarantee.
Additional Resources and Next Steps
This article is part of our series on computer upgrades and repairs. Also see:
For personalized support, contact us or book a drop-off at our Natick shop (no walk-ins; flat $30 one-way pickup or $50 round-trip pickup & return available across MetroWest).
Conclusion
Upgrading from an HDD to an SSD is a cost-effective way to rejuvenate your computer. With careful planning, the right tools, and a systematic approach, DIY enthusiasts can enjoy significant performance improvements. And if you're in Natick, MA or anywhere in MetroWest - Framingham, Wellesley, Wayland, Ashland, Sherborn, Holliston, Sudbury, Dover, Needham, Weston - Easy-PC is your trusted local partner. Start your upgrade today and experience a faster, more efficient PC.